Guide to Making Modular Maps - Part Three
Part three of the three-part guide on getting started in making terrain for Lego tabletop games.

What part of your encounter is necessary for the terrain? This is a question I wrestle with every time I make a map. Inevitably there is always something I don't have parts for or end up leaving out because I forgot to make something for it. Then there is also the question of how realistic do I want to make something look.
A really important thing to remember is that Lego has a cartoonish, stylized, look, and nothing you build regardless of time/effort will change that. It will never resemble realism in the way that some miniatures can. For this reason, Lego works best at filling the gaps in the theater of the mind versus physical 3d space. With that in mind, let's dig in.
Four Items that Make a Map
- A representational grid/space that provides enough space for the encounter.
- Miniatures to represent player and non-player characters (we'll cover that in more depth later).
- Structures/objects that can break up the grid layout of the map and make it more interesting.
- Fluff. Plants, trees, rocks, and any sort of decorative element.
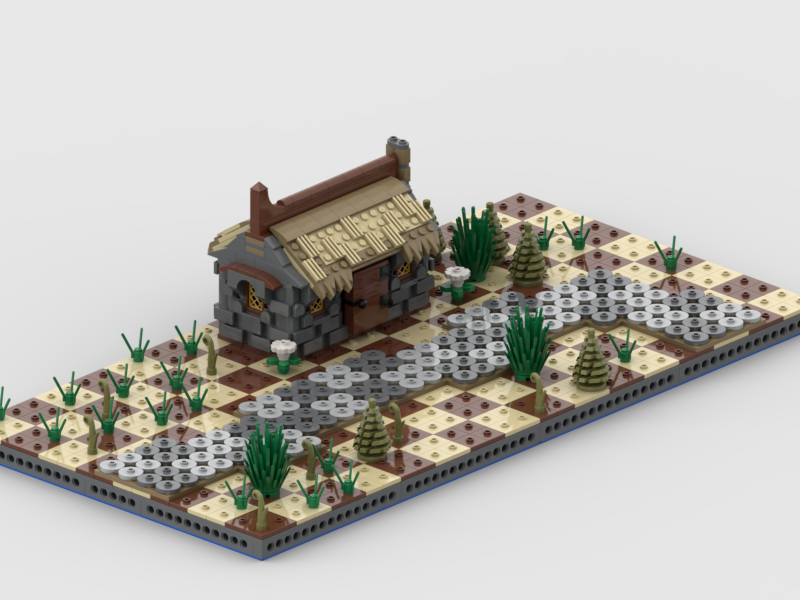
The example above contains all the facets of the style of map-making I've been iterating on. There's a grid for combat/movement. There are structures that break up the grid like rock formations, bushes, and walls. Then there are decorative elements for 'fluff' like torches in the halls. This is one of the first maps of a dungeon I made but it gets the point across and provides a reasonable space for a good session's worth of action to take place.
How much grid space is enough? This is a question I've been pondering for a while. A 32x32 stud MITs board represents 40 feet in game space. Some weapons can reach up to 150+ ft so to accurately have a space that works with that a grid of about 4x4 MITs boards would be needed.
This is a pretty good-sized area for a game map, but, it's somewhat massive in terms of the amount of Lego necessary just to complete this simple design. At my house, we play on a small coffee table that can only accommodate 2x3 MITs boards. That's fine! It's actually plenty in terms of creating a decent encounter space.
Looking at the example from my coffee table, these boards were made mostly with Lego I had on hand (base plates, Technic, internal supports) plus a few trips to the Lego store both online and in person to get the 2x2 jumper tiles and some other features. Lacking variation in 2x2 jumper tiles, I was able to substitute 4x4 green plates but I plan on removing them eventually once I get more jumper tile colors. I will then probably repurpose the green plates for terrain features like hills.
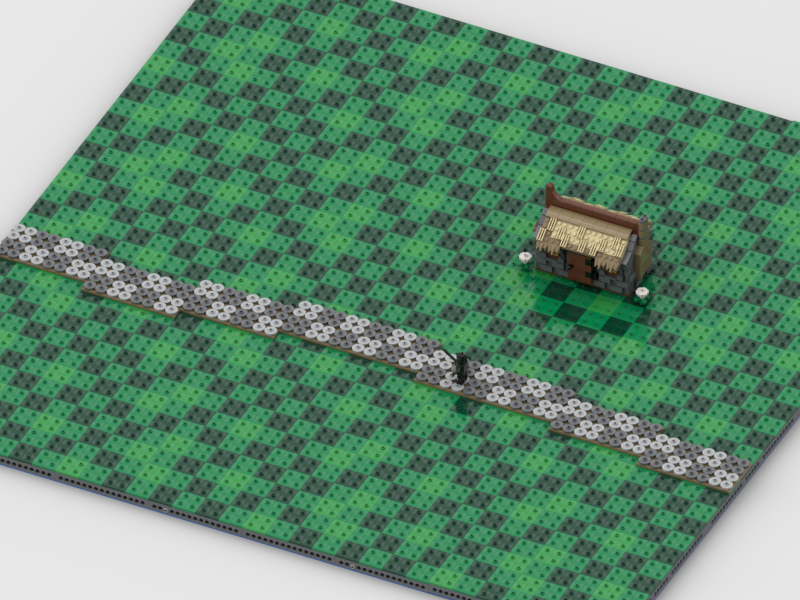
If you don't have all the Lego to get started, that's okay, my first completed board was a 16x32! I ran a few close combat encounters on it with my kids and they loved it! Remember, tabletop gaming is, at its core a game centered around imagination and storytelling. The minis, maps, and terrain pieces are a fun but not necessary to play!
Structures vs. Fluff
The difference between a structure/object piece that is important to your map and a neat piece that is mostly fluff, or decoration, is if the piece is relevant to your story or if it is necessary for the encounter. Fluff, while a lot of it is unnecessary, is relevant to increasing immersion and involvement in the story. I will always recommend some amount of fluff be used in whatever map you choose to make. As for structures and objects, maybe a combat encounter doesn't need a ton of boulders or trees in the way blocking line of sight, but if ever combat encounter took place on a flat surface, would that be boring?
Below is an example I'm working on for a map for the first session of a new homebrew campaign I'm running. Clearly, it's a tavern! It's laid out on a 4x4 MITs board map with an extra 16x32 MITs board in the back. This map has tons of fluff.
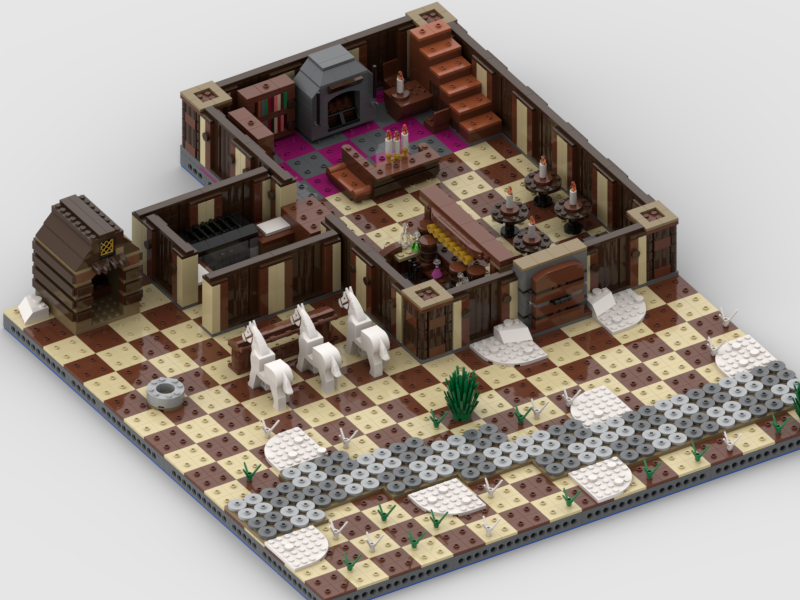
The campaign is set at the end of winter but before spring has really taken root. So there are patches of melting snow and mud all over the place. The outside of the tavern has some plants, a road, a stable area for horses, and a small storage shack next to the backdoor where the kitchen is. Inside the tavern, there's a bar, a performance area with tables, and a cozy lounge area towards the back with bookshelves and a fire place.
This map tells a story. This place is a cozy getaway from the elements in a world that's full of danger. There will be quite a few NPC quest-givers here and one very important combat encounter at some point. This is a lot more stuff than I would probably put on a purely combat-only encounter map.
I've found, as a Dungeon Master, I hate describing the various NPCs in a room, where they are standing, what they are doing, and what they look like. I want my quest-hub area for the start of this campaign to be visualized physically because word-wise, it's just a lot to convey. This is the most detailed map I've made so far and one I'm excited to break out and use and reuse over and over again in different iterations.
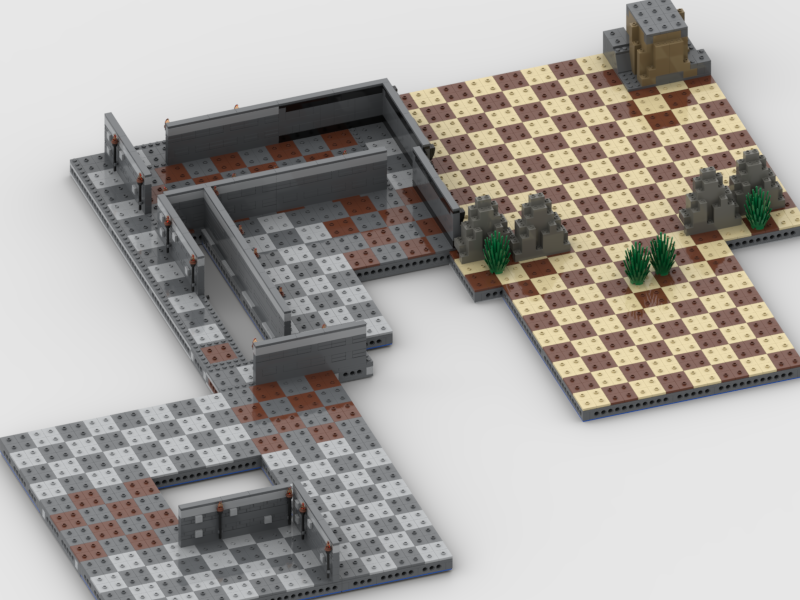
Another example of how to build fluff into a MITs map is to utilize the technic holes on the sides. In this map, I made a cavern that the party descends into in order to retrieve a special item. I wanted to give a sense of being in a cavern but without putting up a ton of walls and leaving the game space mostly open.
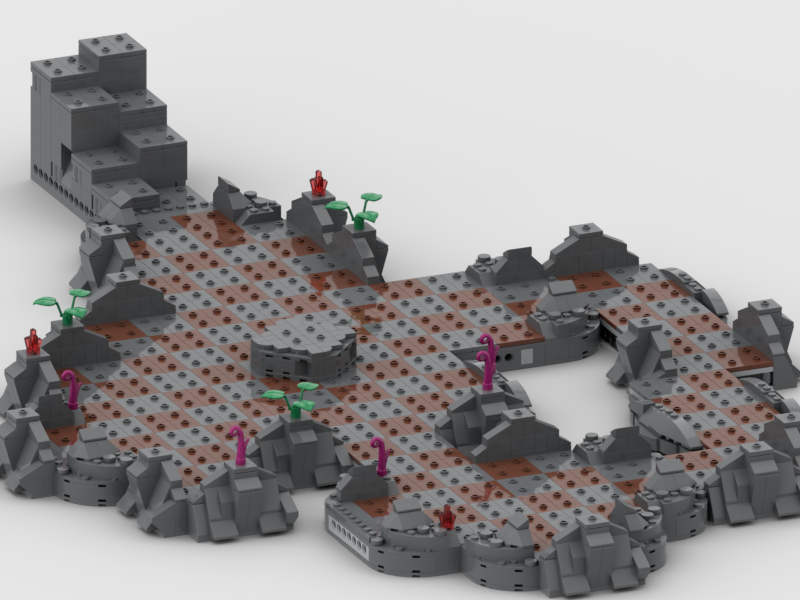
I added some exotic-looking plants, crystals, and rock elements to give the appearance that this place was underground. I tried to make the way through the cavern as assymetric as possible by slightly altering the gride when I could using a combination of 8x8 MITs boards and 16x16 MITs boards.
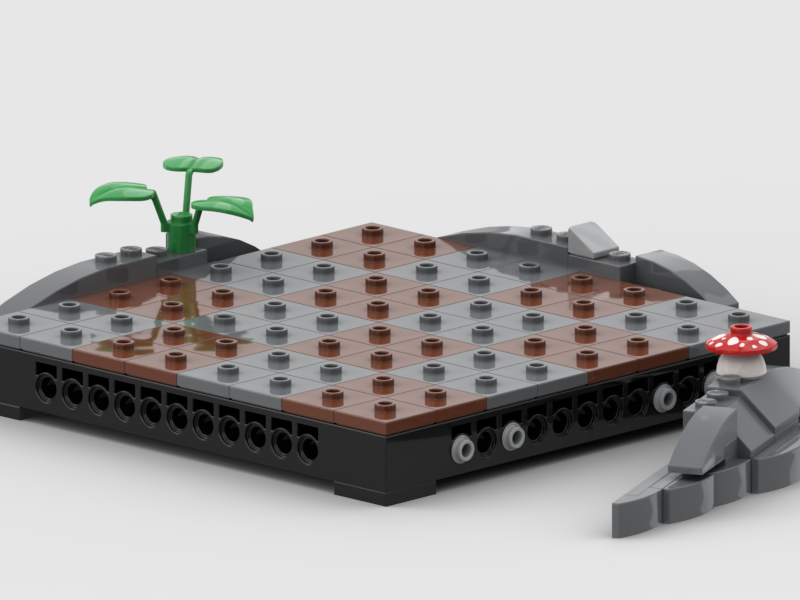
Taking away the fluff, this map looks like this:

I would still use this map, but I love the little rock wall elements and plants that were added to not only give a certain vibe of being in a cavern but also, round out the boxy appearance. Caves do not contain straight lines but Lego is very boxy.
Advanced Terrain - Hills
Hills are both an object and a terrain feature. For making hills to suit my MITs systems, I've created a series of 16x16 MITs boards with different levels. From there, I used 4x4 pillars of varying heights to fill in the gaps.
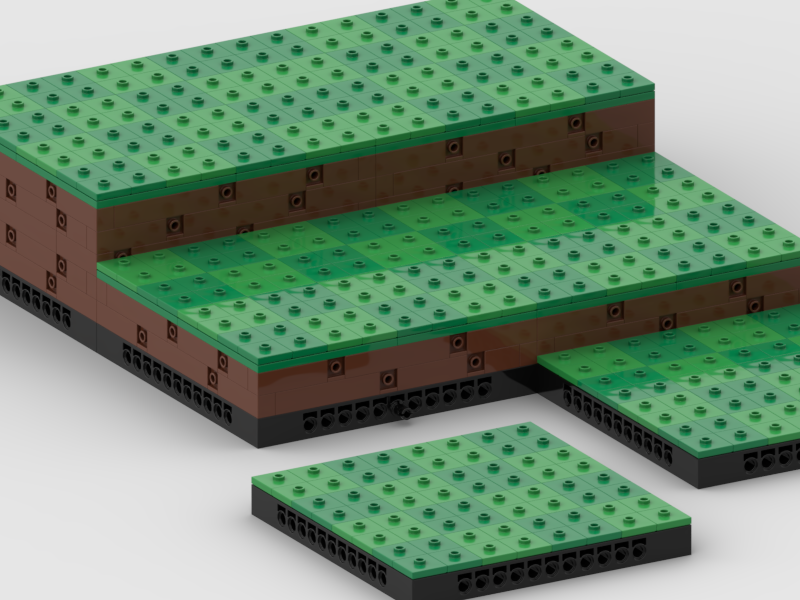
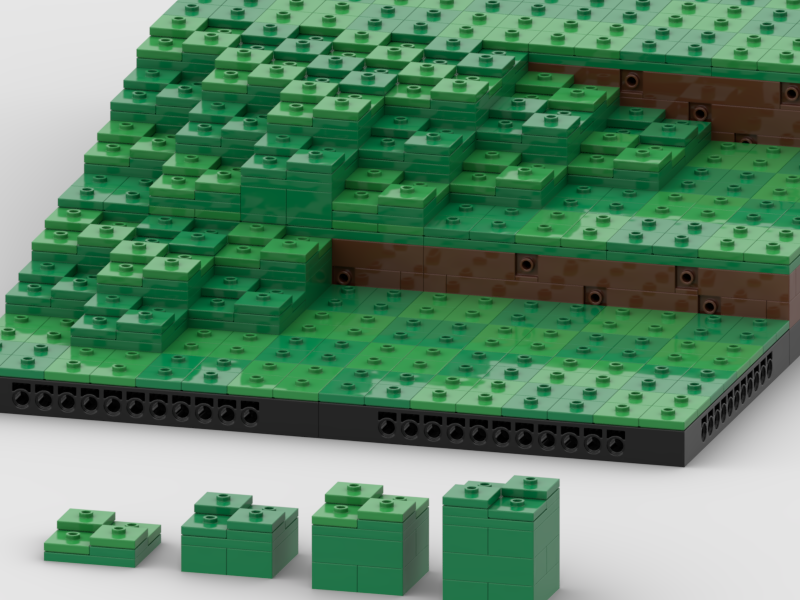
The filler pillars are what really make this terrain dynamic. Each platform is 3 blocks high to the tip of the next platform. Each pillar is incremented in height by one block. By varying the height of the 2x2 jumper tile in the last level, it breaks up the terrain and achieves a sort of rougher look. This can be very useful.
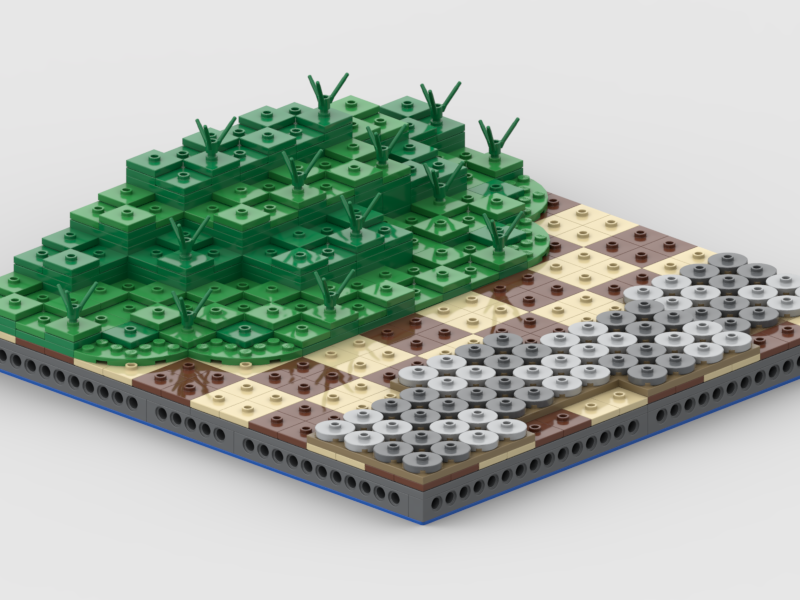
Here's a hill made out of nothing but pillar blocks. Note in this, I used 4x4 rounded wedge plates to break up the blocky look at the base.
I will be exploring more options with these more advanced methods of creating terrain. I think in combination with the MITs boards and these types of terrain pieces, it will be possible to create amazing modular maps with hills, cliffs, and different levels - easily - and without being exorbitant in price.