Guide to Making Modular Maps - Part Two
Part-two on how to make modular terrain using Lego.

Second Rule of Map Making - Durability
One of the advantages of using Lego for making modular pieces for tabletop gaming as opposed to papercraft with cardboard or insulation foam is how well Lego pieces hold together. While some components of the map like trees or rock walls might be more prone to breaking, the maps themselves are stable.
Introducing MITs!
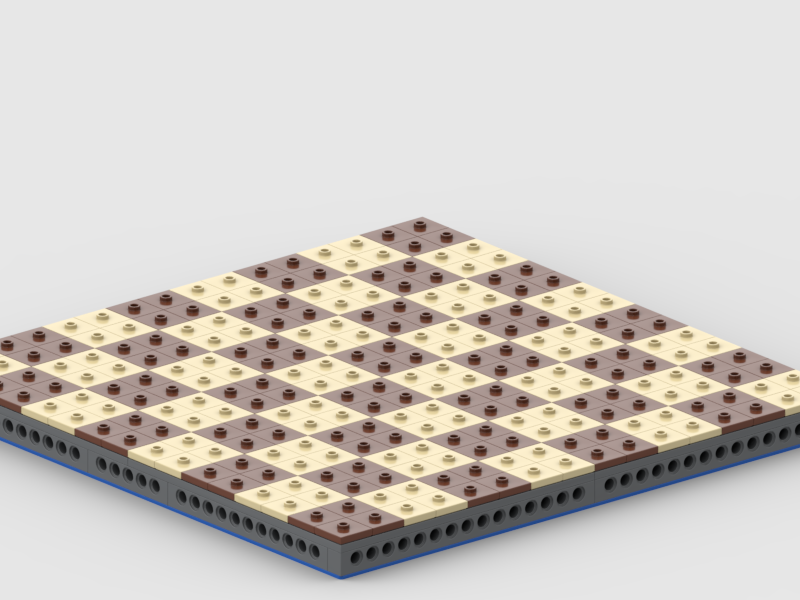
The way I make my maps is a variation of MILs or Modular Integrated Landscaping System, or in my case, Modular Integrated Tabletop system. The basic concept of MILs is to take the large flimsy 32x32 stud base plate and add Technic bricks to the middle layer with 2x2 or 2x4 bricks used to support a top layer of plates. This sample shows 4x4 plates being used as the top plate but it is not necessary in order to get the concept to work.
MILs base plates are very strong compared to a regular 32x32 stud baseplate. The top layer of plates prevents the flimsy base plate below from buckling. The middle bricks support the top layer and provide excellent support for anything being built on top of that.
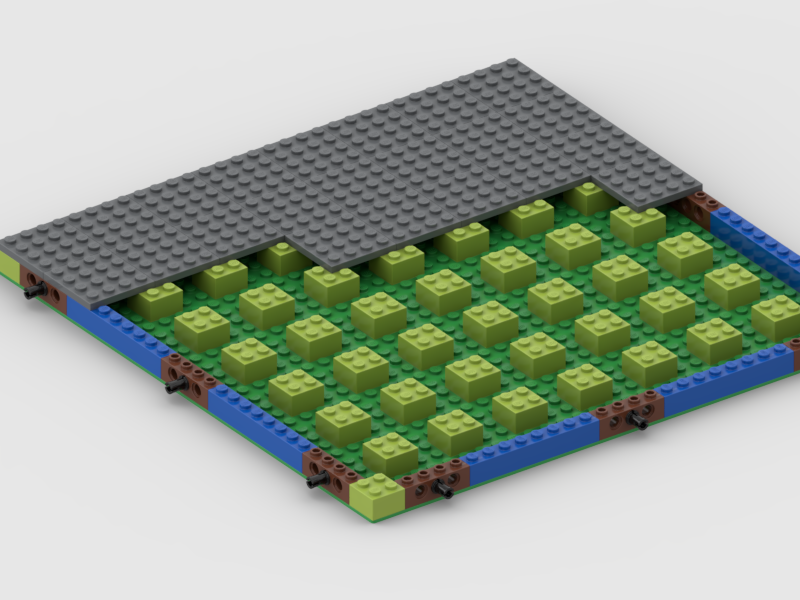
MITs game boards work the same way as MILs in how they provide support. The key difference is the use of the 2x2 jumper tile (87580). This tile is necessary for making a MITs board because it makes it possible to populate the board with set pieces and props that can be easily removed or taken away.
MITs boards work very well with anything using studies in intervals of four. An 8x8 stud rock piece can fit very easily on a MITs board and be removed just as easily for quick disassembly.
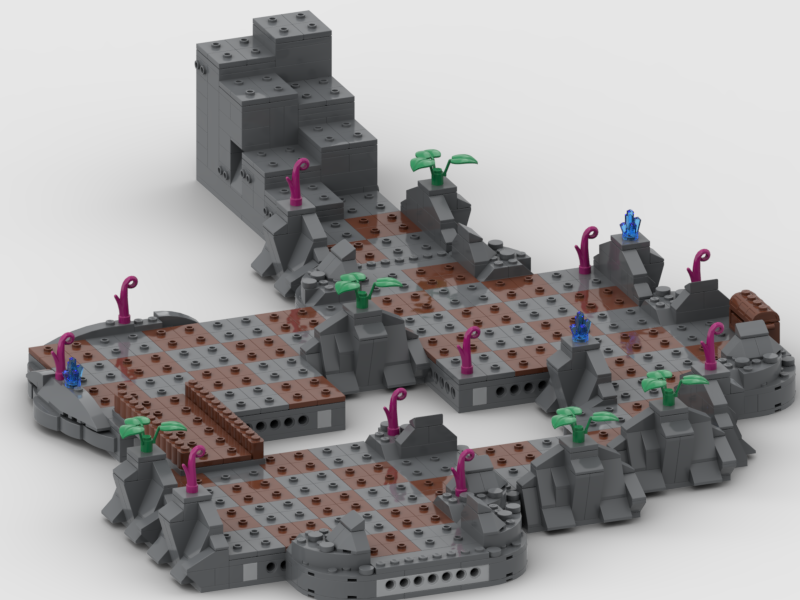
Some examples of my own MITs boards:
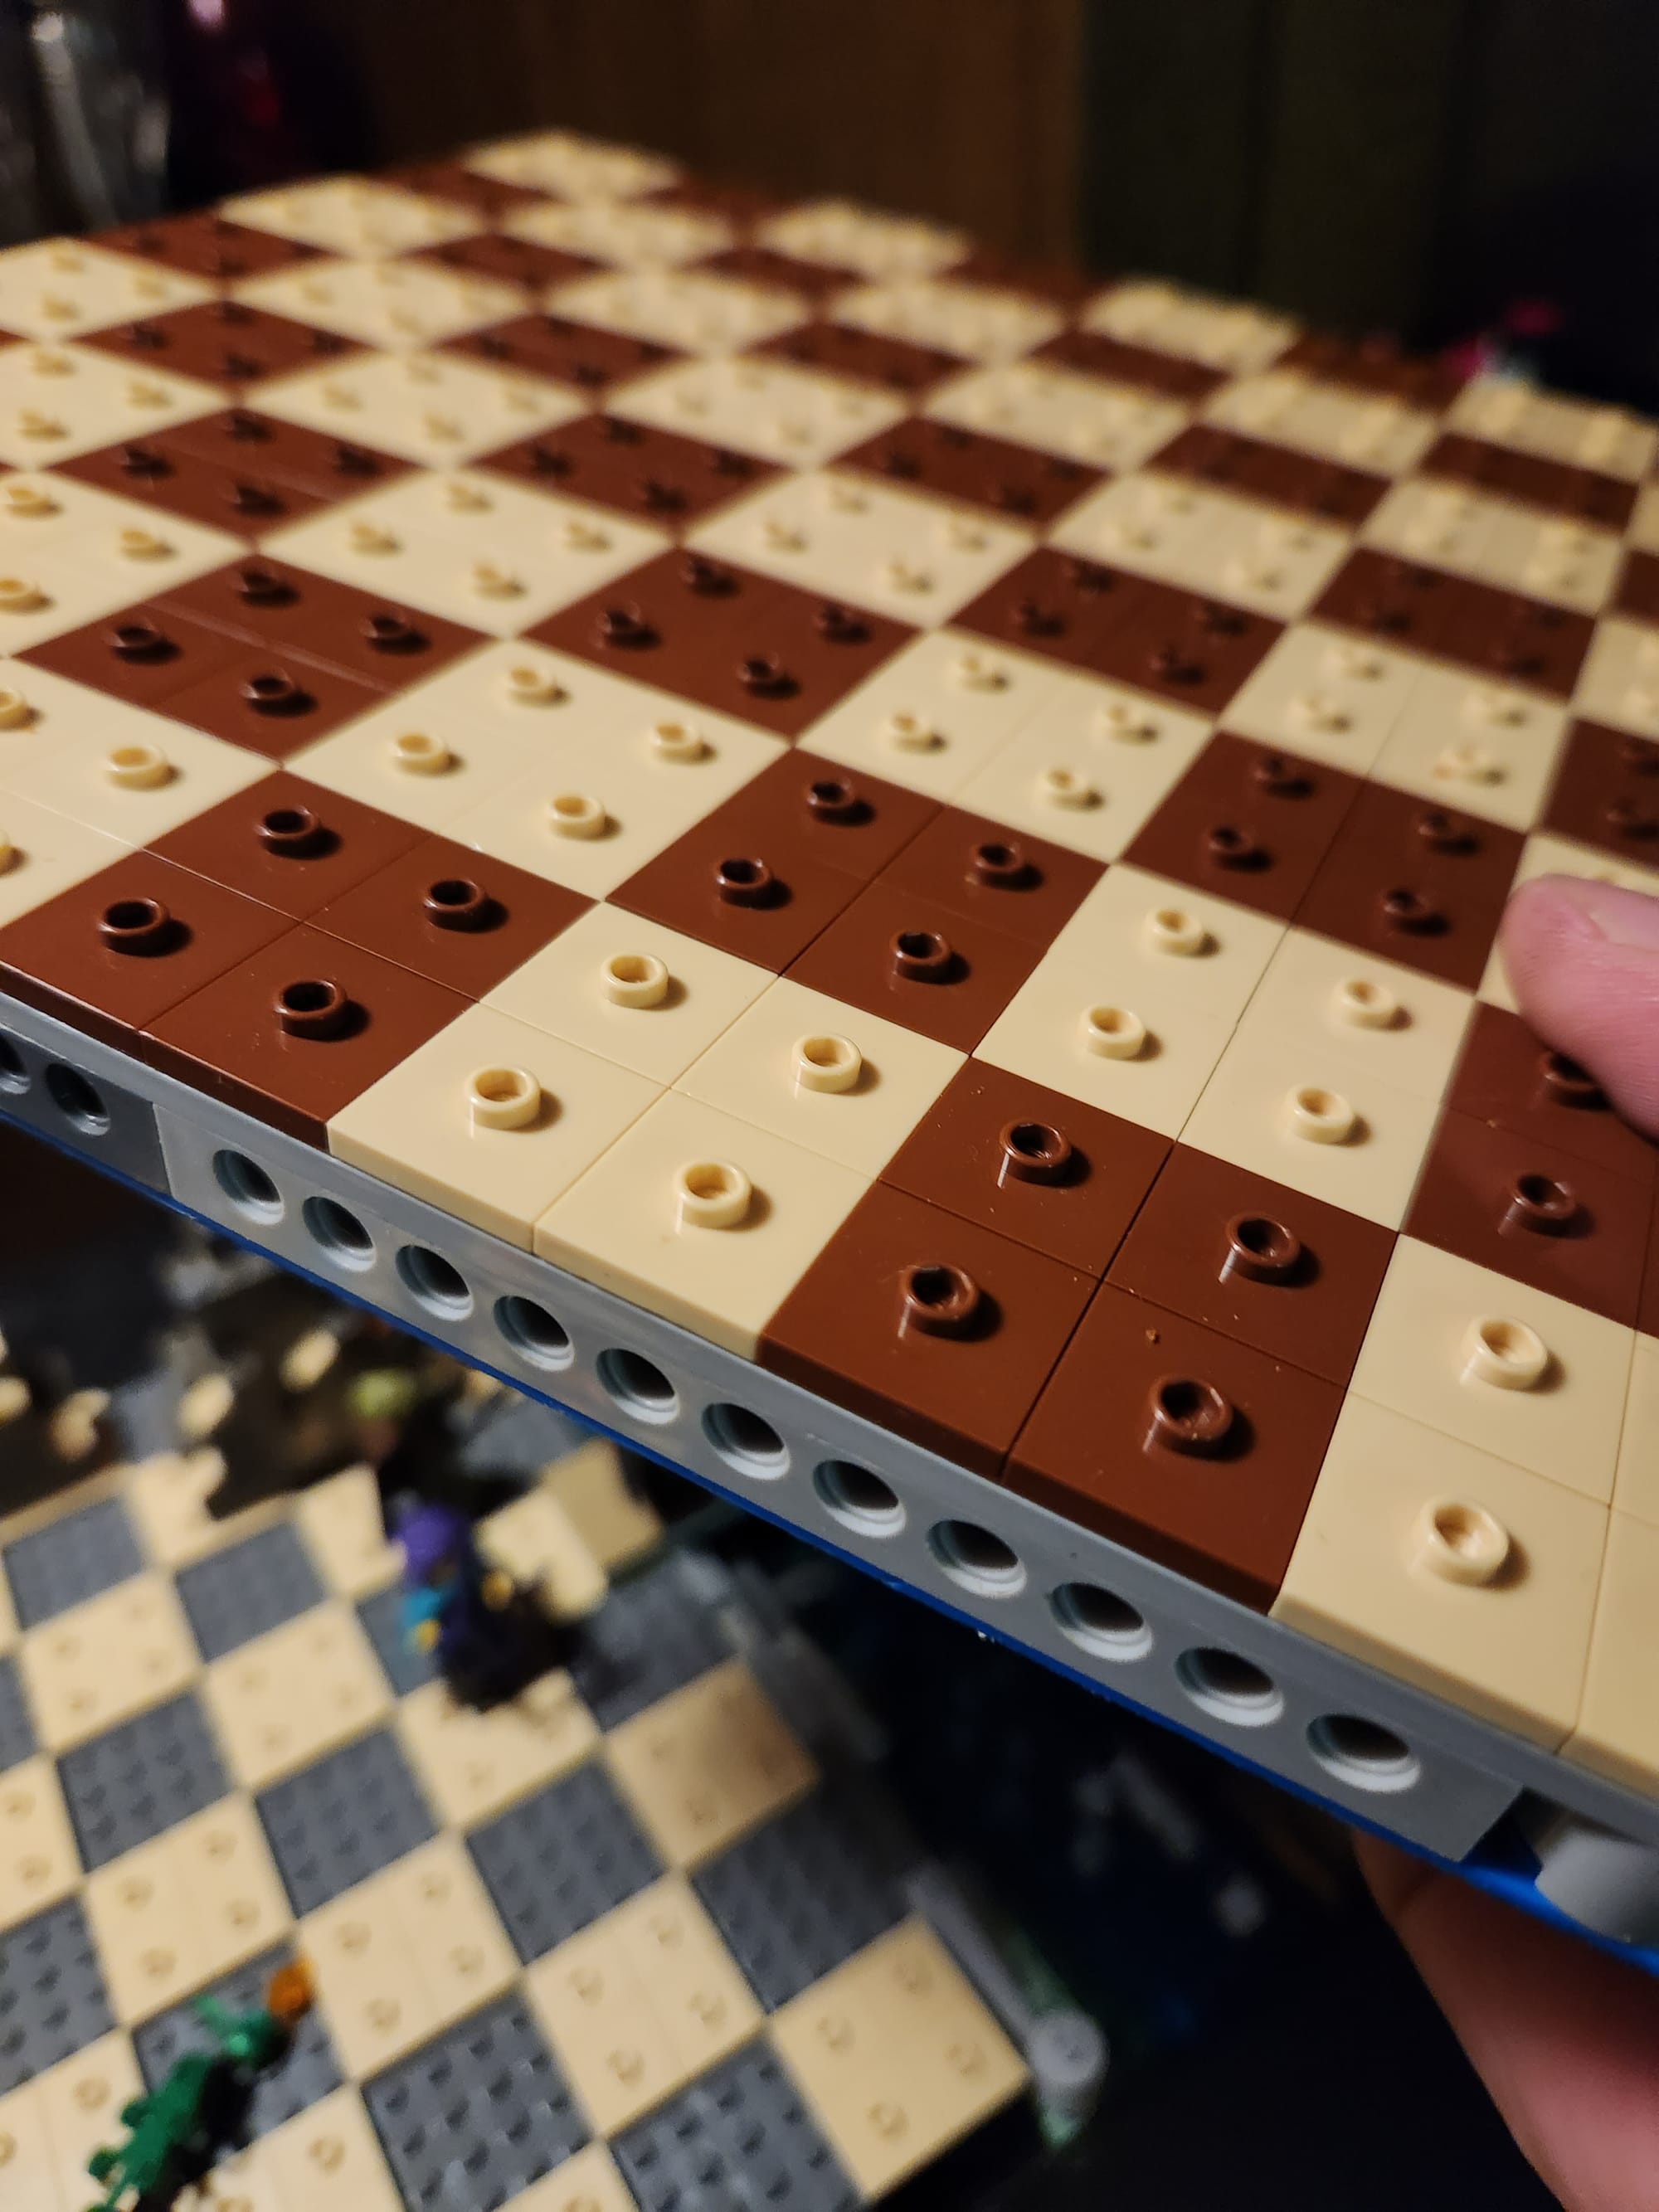
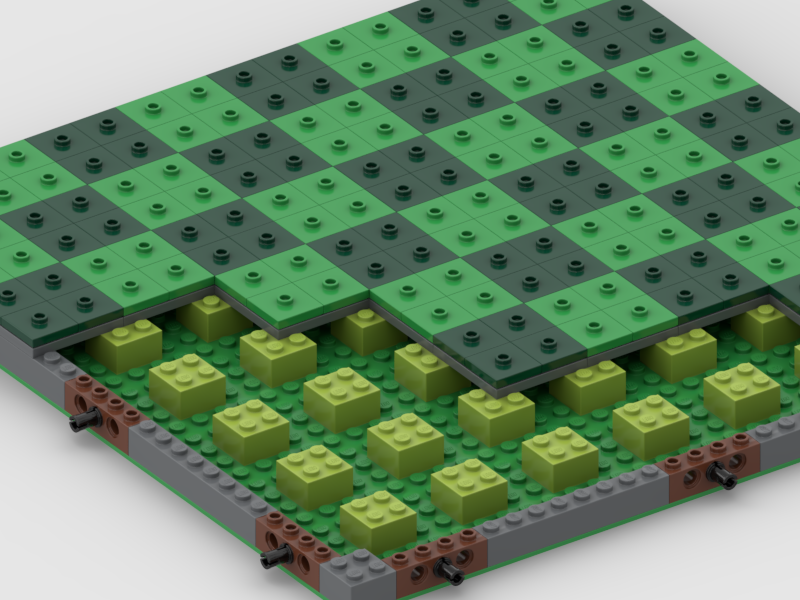
I like using Technic bricks all the way around. I find that for some boards I might want to arrange them in different arrangements and want as much flexibility as possible. Also, if you ever want to attach terrain or decoration to the sides, it's a lot easier with plenty of Technic pin holes to choose from.
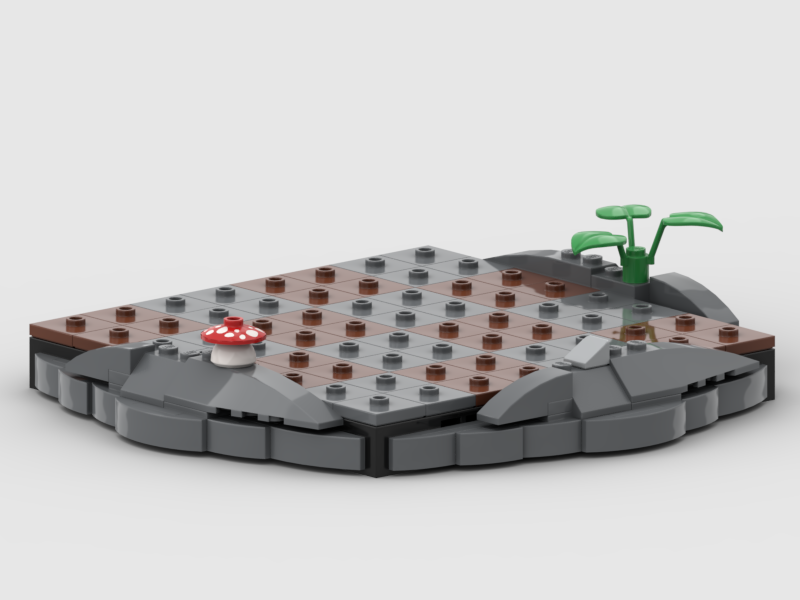
Mini MITs
The Mini MIT is a 16x16 stud one-piece technic brick/plate combination that is used in making the Lego dot artwork. This piece is starting to become my favorite piece for building modular terrain as it can be easily mixed into dungeons and outdoor spaces.
Less is More
Lego design tends to go in two directions. You can make something strong but it will lack finer detail or you can make something highly detailed but it will have a lot of pieces that will fall off.
When I'm trying to make modular terrain in Lego, I'm trying first and foremost to make reusable game boards that I can switch up at a moment's notice and won't fall apart in transit. I also want to do it cheaply. Fewer bricks is often cheaper, but that doesn't mean going out and buying as many 1x16 Technic bricks or 16x16 plates as possible. There's a balance.
I know I tend to overcomplicate when I'm building something out the first time. I have too many bricks, legacy bricks, or the bricks I'm using are expensive. So I'm always going back and checking in Studio to see if I can make it with fewer or cheaper bricks.
At the end of the day, do what makes you happy. I hope this gave some good ideas on how to make stronger Lego terrain pieces using modular concepts based on MILs. There are other ways to make modular Lego Terrain which we will explore in the future!