The Ultimate Modular TTRPG Lego Board - Introducing MITTs 3!
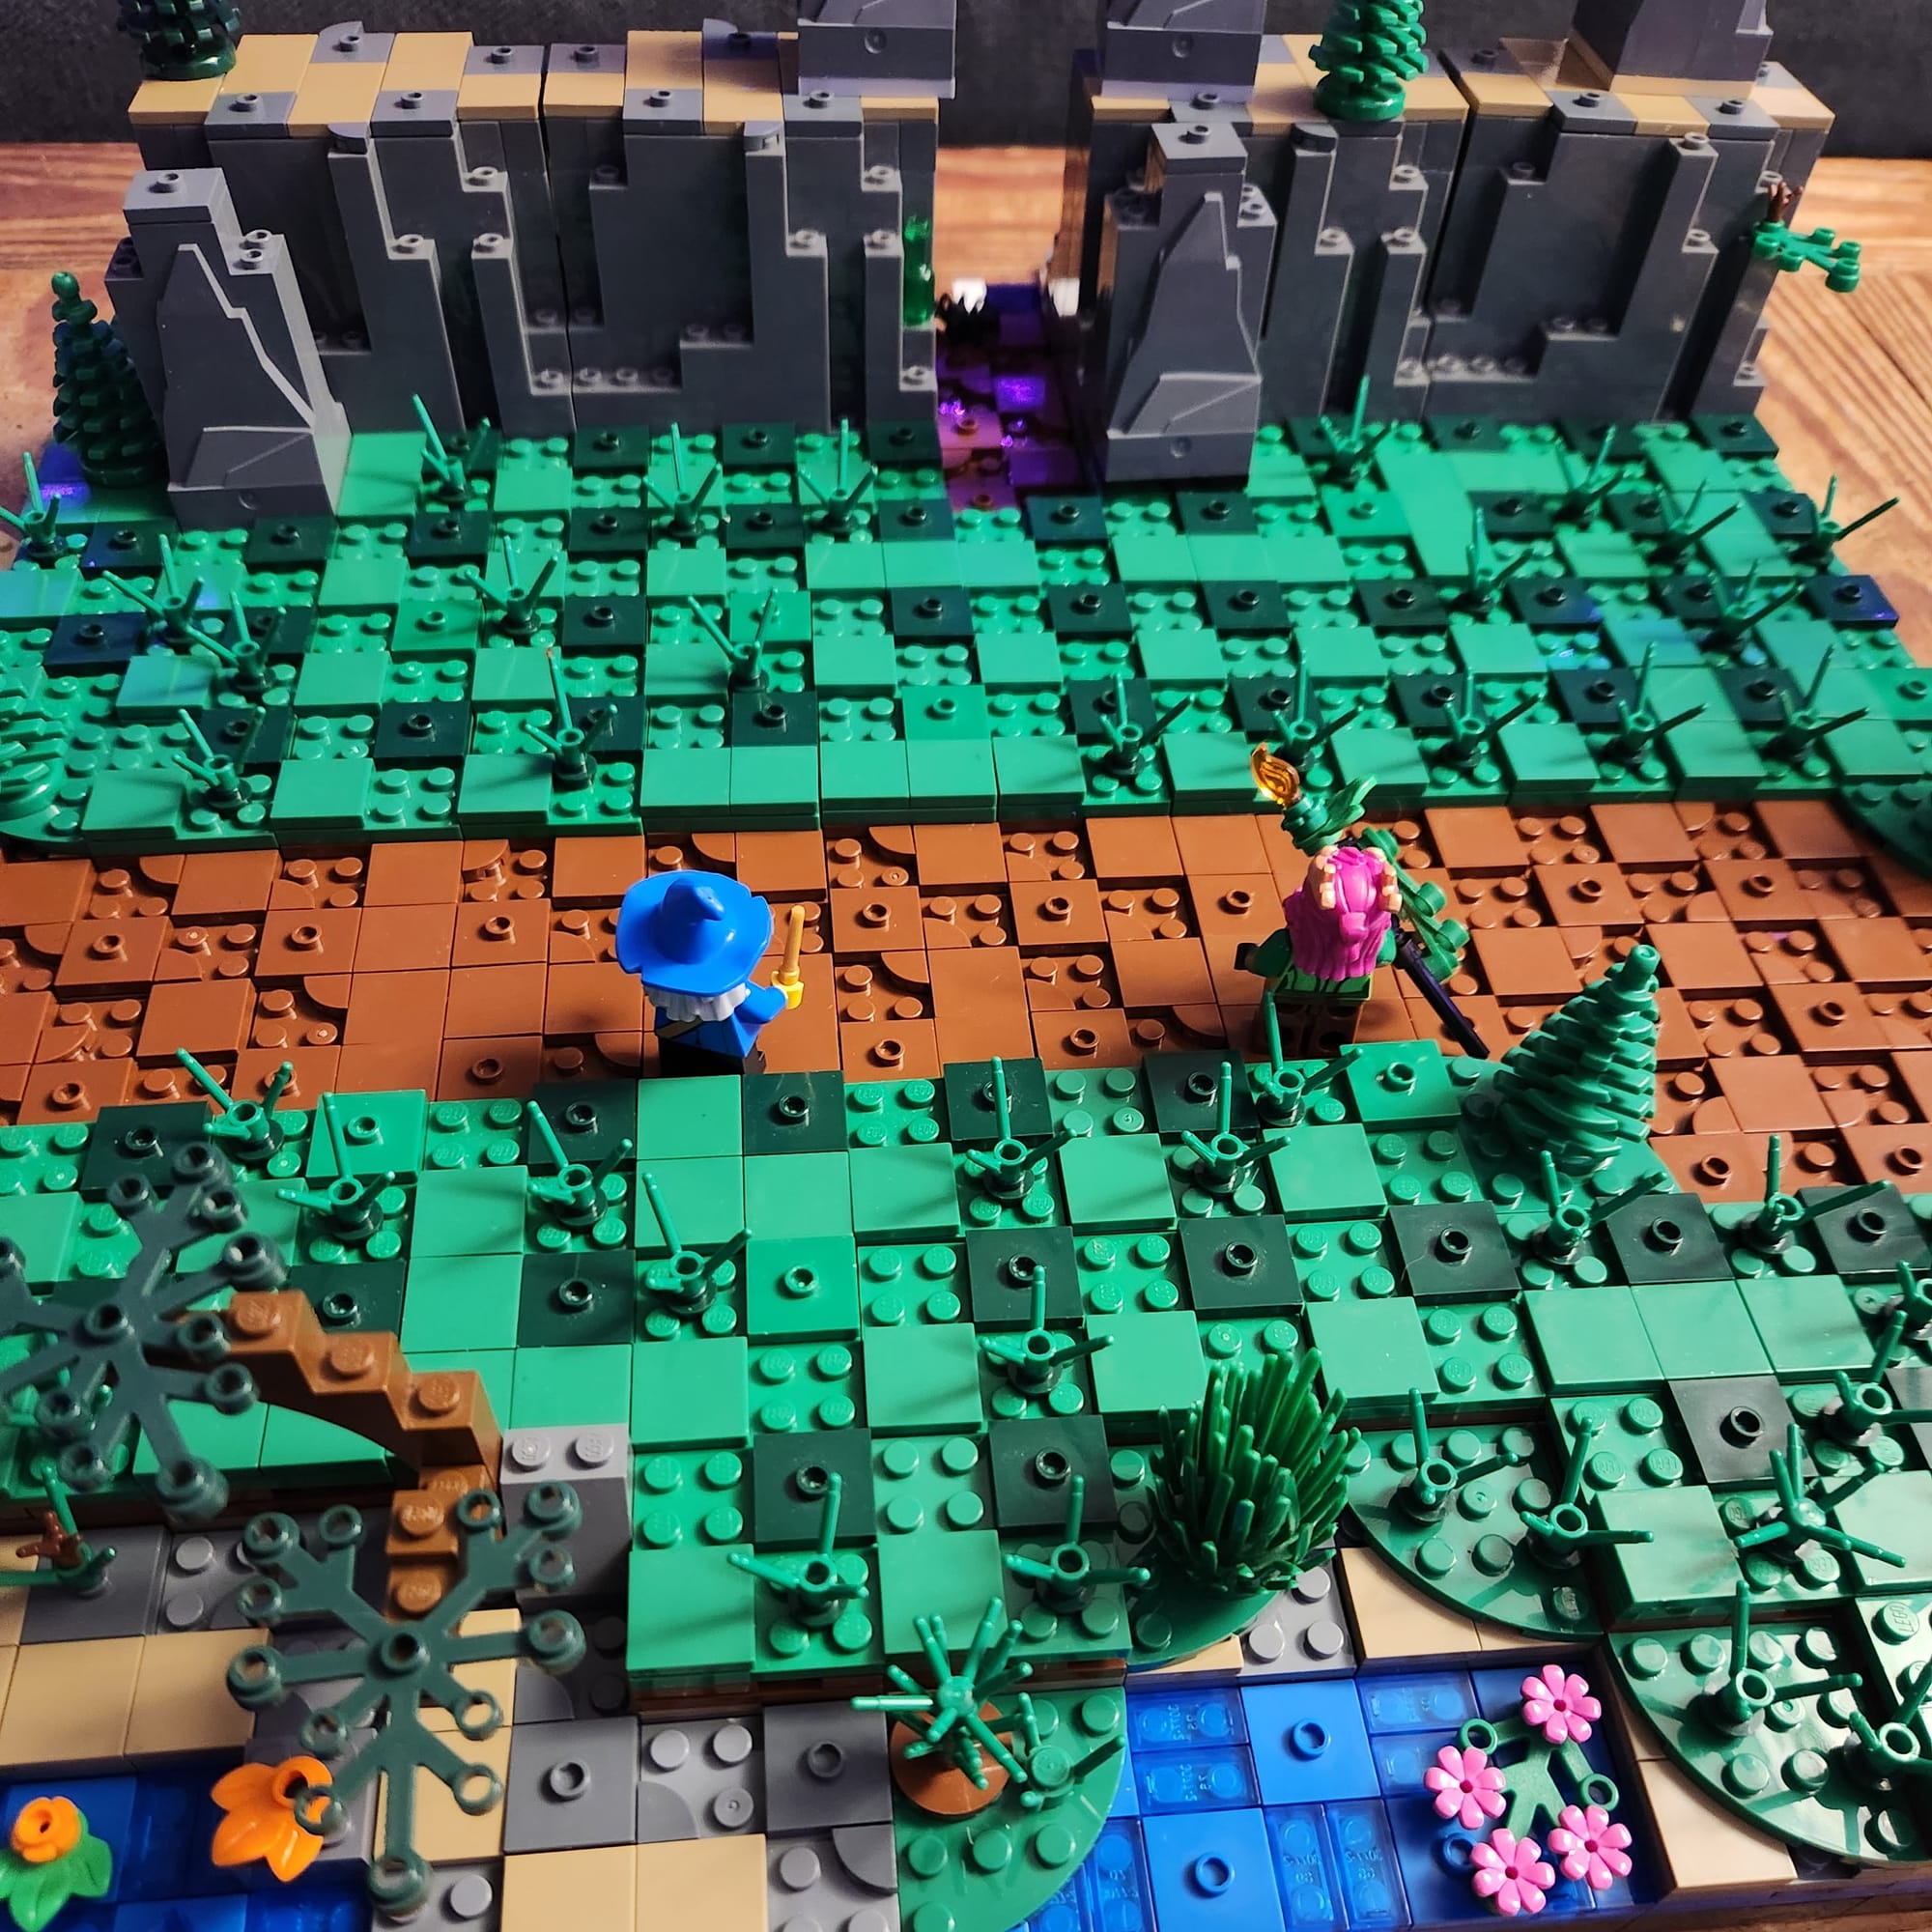
Building with Lego has been a lifelong passion that has recently met a new interest - tabletop gaming. For anyone paying attention, it should come as no surprise that Lego enthusiasts and TTRPG players share a lot of commonalities. This year has been fantastic for being a Lego fan and a Tabletop RPG fan thanks to Lego's Dungeons and Dragons 50th anniversary set and the minifigures that have come from it.
I began making my first maps and developing the idea for MITTs (Modular Integrated Tabletop Terrain) as something that could be based around a checkerboard grid and swapped/in and out as needed. I found the idea of creating grid lines with Lego problematic. Some people advocate using string, some people advocate checkerboard or alternating tiles of some pattern. MOC - RolltoBrick's Modular Grid System solves a lot of issues with not having 'grid lines' in Lego with his use of technic, tiles, and panels that are put together to create a complex, but genius, solution.
For the last several months I've been in a bit of a funk when it comes to figuring out what to do with this site and how to navigate/advocate using Lego for TTRPG. After play testing my original system, MITTs 1.0, I was finding that the modularity I had been going for was still too limiting. I wanted something cleaner, something that allowed more terrain detail, more immersion while still retaining the Lego style. I needed to start over.
Starting over is scary, but I'm glad I did. The system I've created from that is far and away better than anything I had hoped for. The solution is (1) use only one jumper tile per 4x4 stud grid square and (2) layer grids on top of one another so they can be "peeled" back to reveal interesting terrain features.
Check out this map I made for one of my first Lego TTRPG encounters (below).
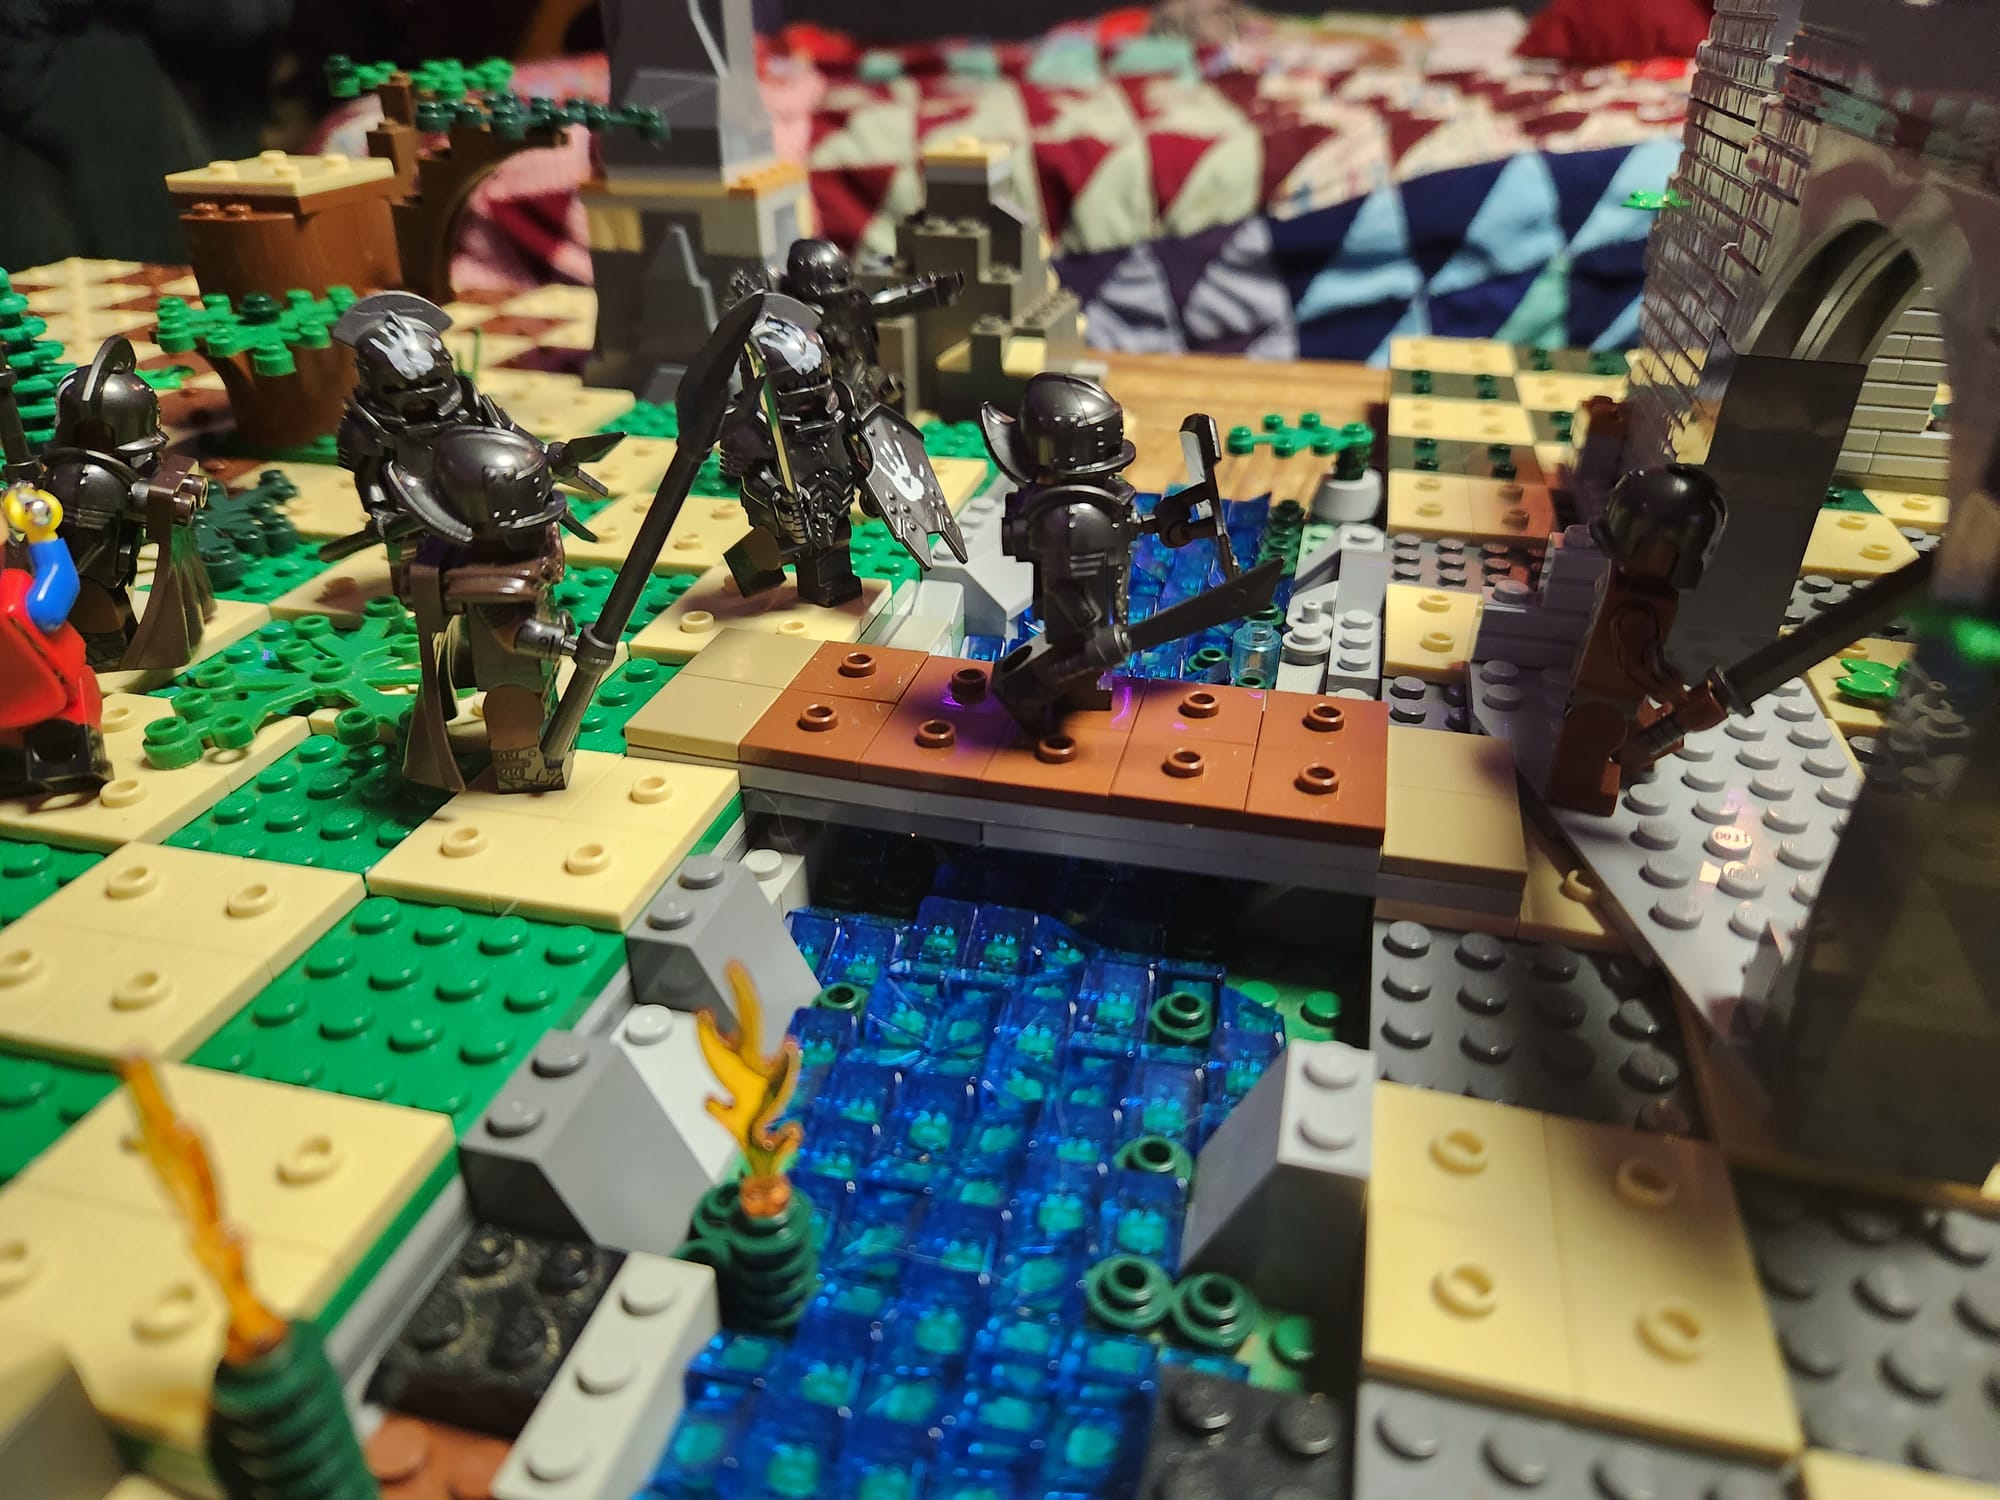
Baddies are trying to cross a water feature. The water feature is a bunch of blue 'cheese wedge' tiles on plates sandwiched between my modular boards. It creates a little bit of depth, but it's only workable if the water feature is going in a straight line.
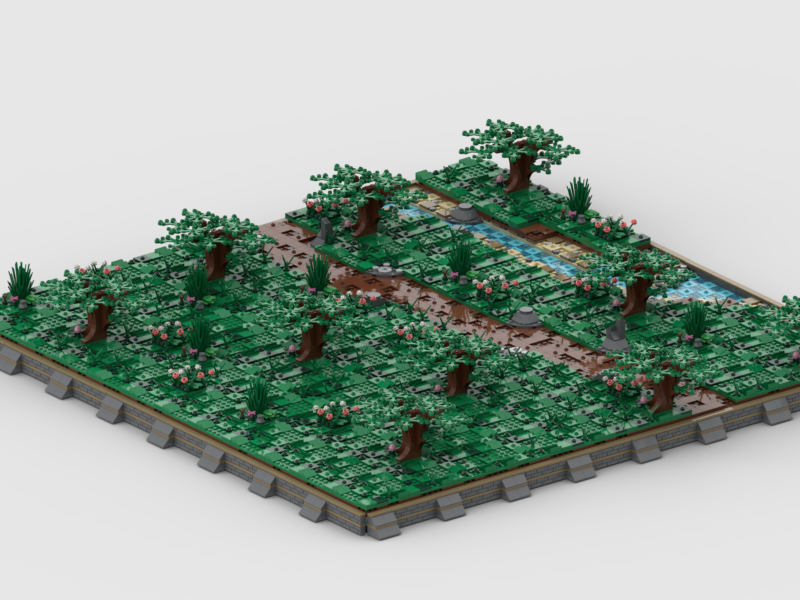
Now compare to the example below. It's possible to have water work its way around the map as it would naturally, by simply "peeling" away the layers on top. This creates a subtle elevation effect while also allowing flexibility for the game master to decide when/where water will be an obstacle.
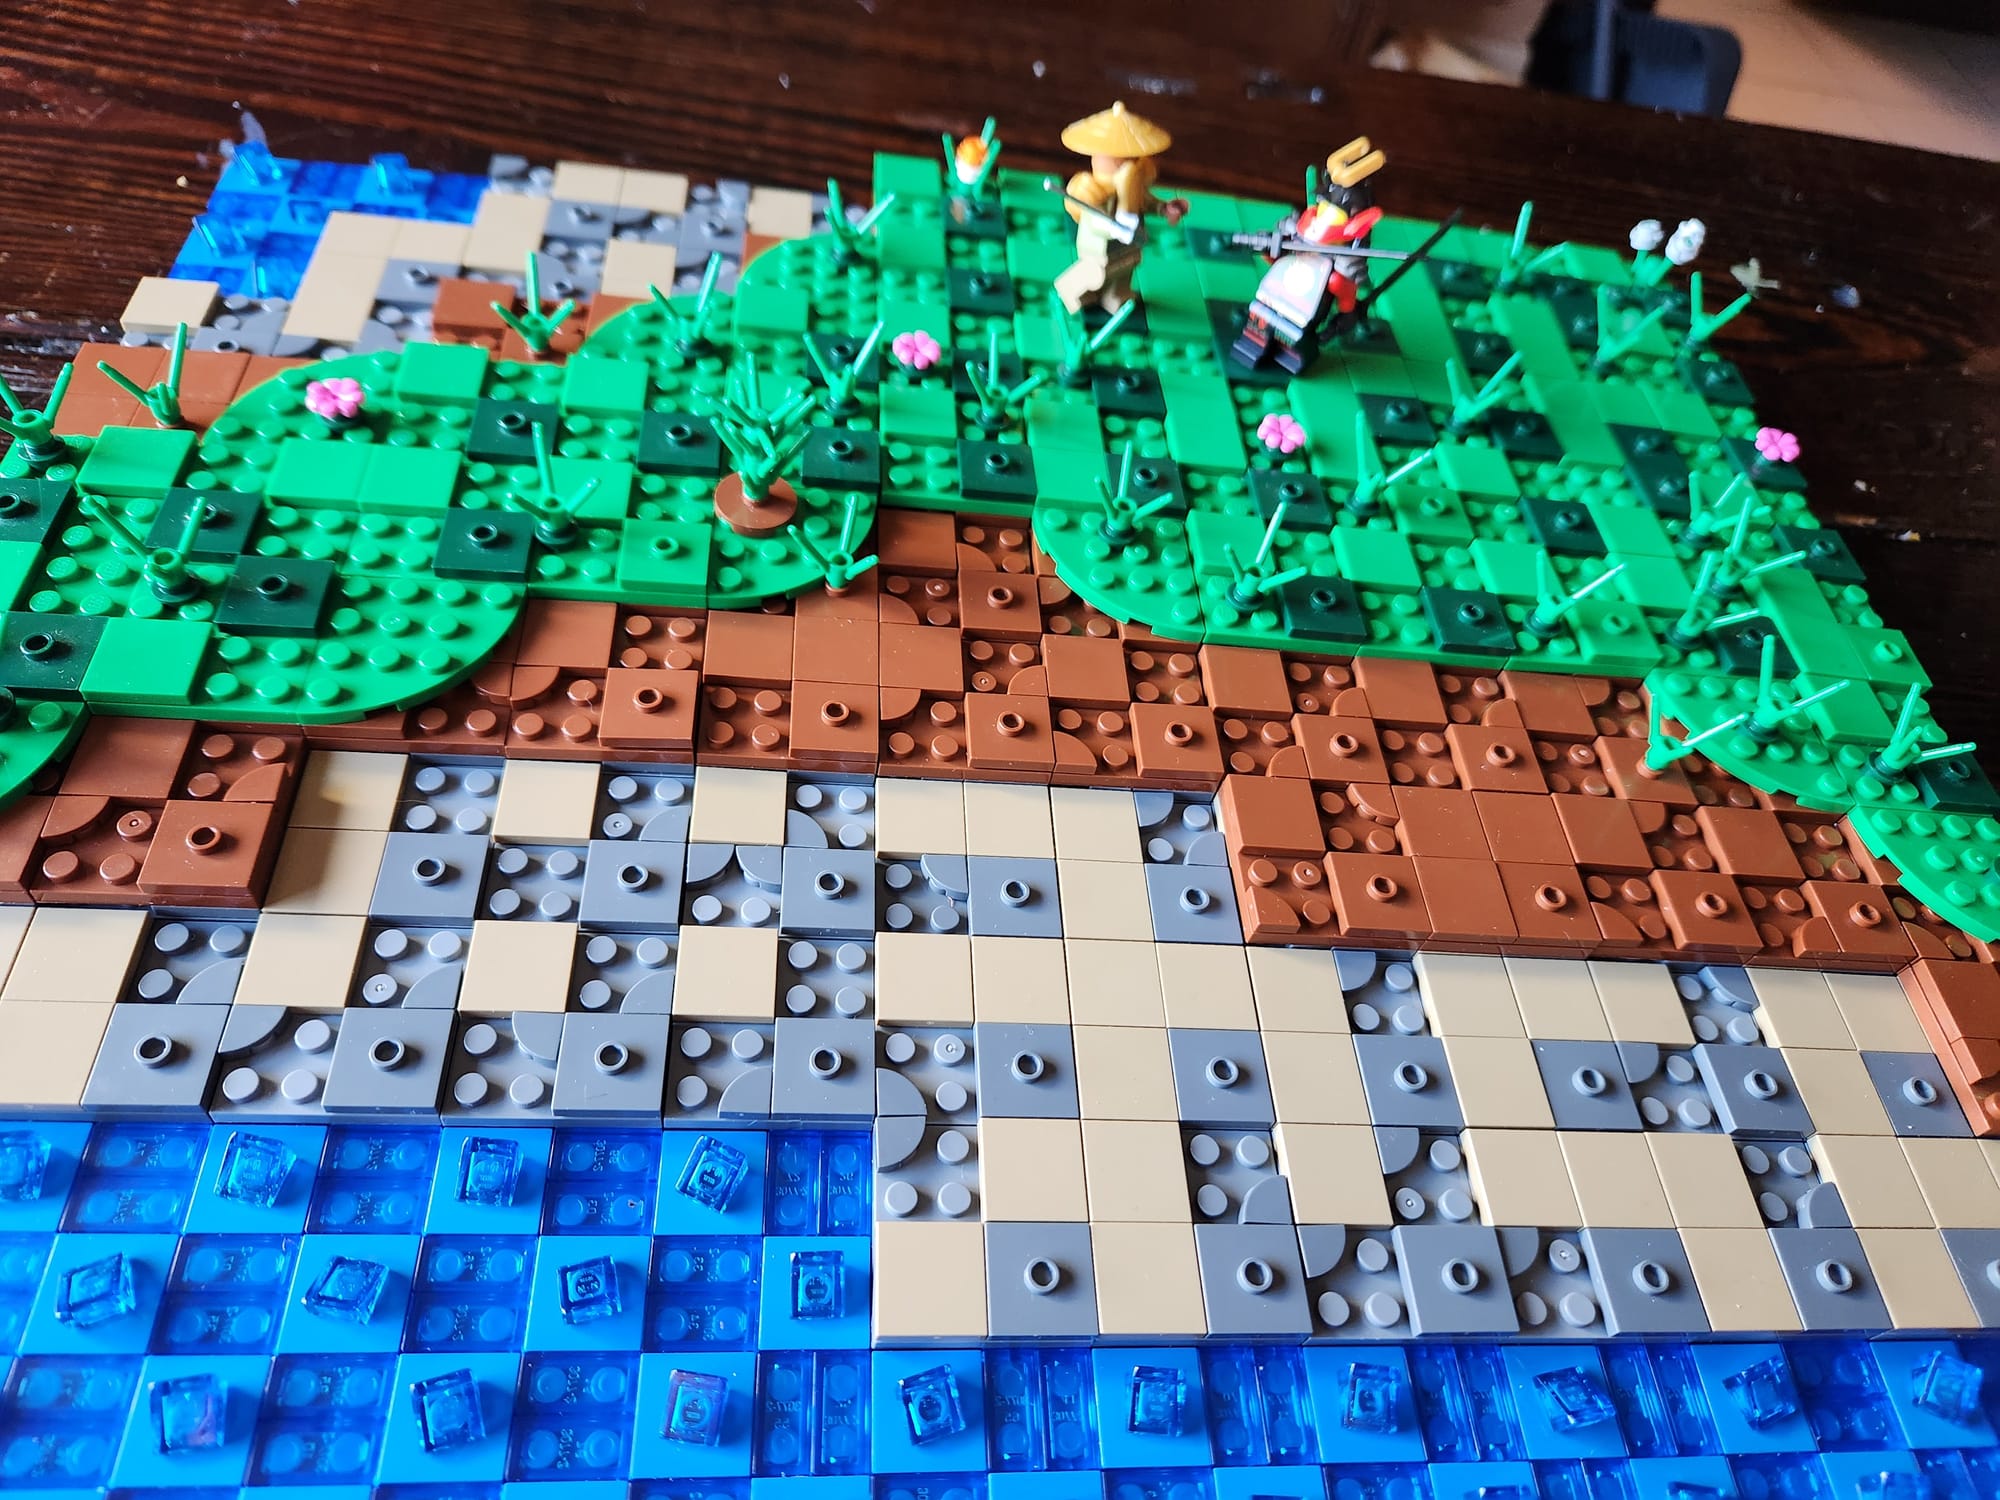
What I found was really invigorating. By layering terrain, I was solving multiple problems I was having with my initial design of MITTs which are:
(1) Checkerboards are limiting and not very immersive.
(2) One terrain type per 16x16 or 32x32 board is very limiting and requires either rebuilding boards to swap different terrains or collecting lots of boards.
(3) Elevation changes are difficult to achieve.
With the new MITTs, MITTs 3.0, it's possible to create more immersive terrain, have greater terrain varieties per terrain board, and achieve slight elevation changes by simply removing layers.
Designing MITTs 3.0
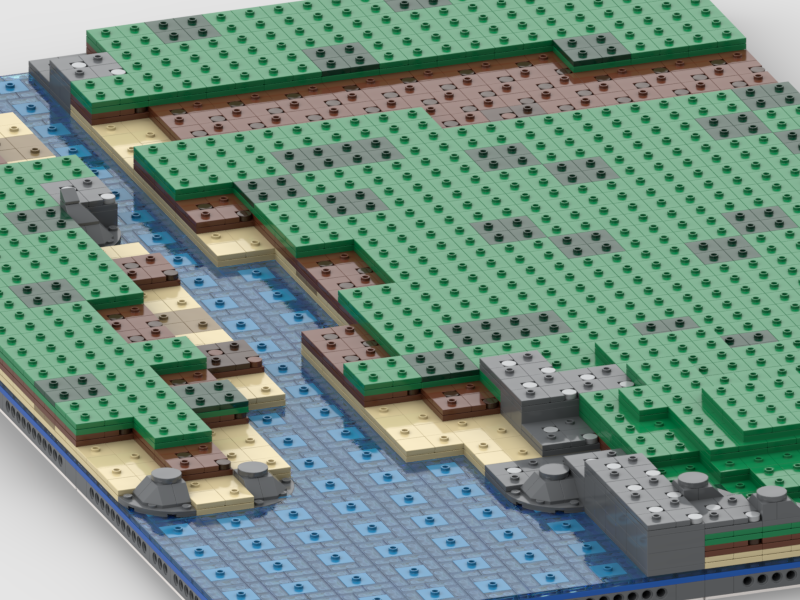
The model above shows a few different placements of jumper tiles. I was trying to decide where I wanted them and how many were necessary. I built some smaller mocs to test this concept with. In doing this testing (not in using Stud.io) I discovered – all you need is one jumper per grid square to hold the other tiles in place. Four jumper tiles are too many.
One jumper tile is plenty. The grid is still apparent as long as the jumper tiles can be spaced evenly. So instead of counting squares for movement - count jumper tiles. 1 jumper = 1 movement point (except the water layer where 2 jumpers = 1 movement point).
The water layer works a little differently. I want to have stability, the more layers that are piled onto one other, the less table the grid gets and layers start to slightly 'wobble.' so instead of using 1 jumper tile in the water layer, I've started using two. This is because the water layer is not always used and it is at that point, part of the support system for the other layers. Also, since the water layer is the base layer of this new system, it can go on 16x16 plates instead of 4x4 ones. In this way there is more interlocking for the terrain as a whole, making it more stable.
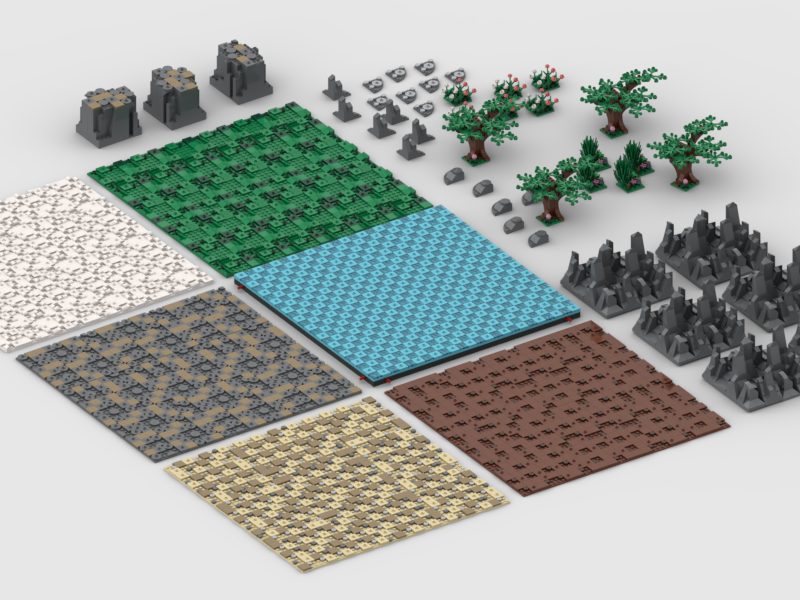
The layers I'm using currently are:
(1) Water - Medium Azure jumper tiles and trans light blue 1x2 tiles. This layer is the base layer and is on 16x16 plates. Used for streams, shore lines, rivers, and open water encounters.
(2) Rock - Dark bluish gray jumper tile, dark gray 2x2 tiles, dark bluish gray 1x1 corner tiles on a dark bluish gray 4x4 plates. Used for dungeons, Underdark, roads, and cities, it is very versatile.
(3) Dirt - Reddish brown jumper tiles, reddish brown 2x2 tiles, reddish brown 1x1 corner tiles on reddish brown 4x4 plates. Used primarily for roads and paths but is also nice for environments that need to look inhospitable - think Dark Sun - but with Lego!
(4) Temperate - Dark green jumper tiles mixed with green jumper tiles, 2x2 tiles, 1x1 hollow studs (plant holders) on green 4x4 plates. Standard outdoor decor, useful anywhere that calls an encounter in the hinterlands/countryside.
All of these parts together now form a sort of second set of building blocks that can be used as necessary. In one of the examples above you can see that it's possible also to grab these different 4x4 building blocks and build additional features on top of the main terrain feature. The possibilities are numerous.
Assymettry is Interesting
Lastly, on the design, I feel like it's important to keep the terrain pattern as interesting as possible. while the jumpers should try to be evenly spaced, feel free to get creative when filling out the remaining space. I like to leave open spaces for studs should I want to connect other terrain features/props so I don't steal a jumper tile.
Rounding off the Edges
One thing these sort of terrain maps really remind me of is Minecraft. They have a sort of endearing blockiness to them. To smooth it out, I highly recommend getting a selection of rounded 4x4 plates in your various terrain color types that can help smooth the transitions between layers. A good catch-all for this would be a rounded 4x4 plate with rocks on it. This piece could be placed on any layer and would be incredibly useful on any map.
What size board to use?
I feel comfortable moving most of my terrain to 48x48 boards. The goal I have is to attain x4 of these boards which will give me a gaming grid of roughly 120 ft x 120 ft (in-game) for making encounters and small dungeons. I feel like this is realistically obtainable for me but of course, more would be welcome. Once the terrain is acquired, the rest of my time can be spent creating interesting decor and encounter types.
I feel confident moving everything to the larger board size because the terrain layers need stability. That's not to say they wouldn't work on a 16x16 or a 32x32 board, I just feel like in this case, bigger is better or at least more stable. I also feel like it's easier to scale the larger boards. I felt like I was constantly running out of space on my 32x32 MITs terrain pieces and now that I've had some time to do some encounters and test the 48x48 boards, they work much better.
Compatibility with other Terrain Boards?
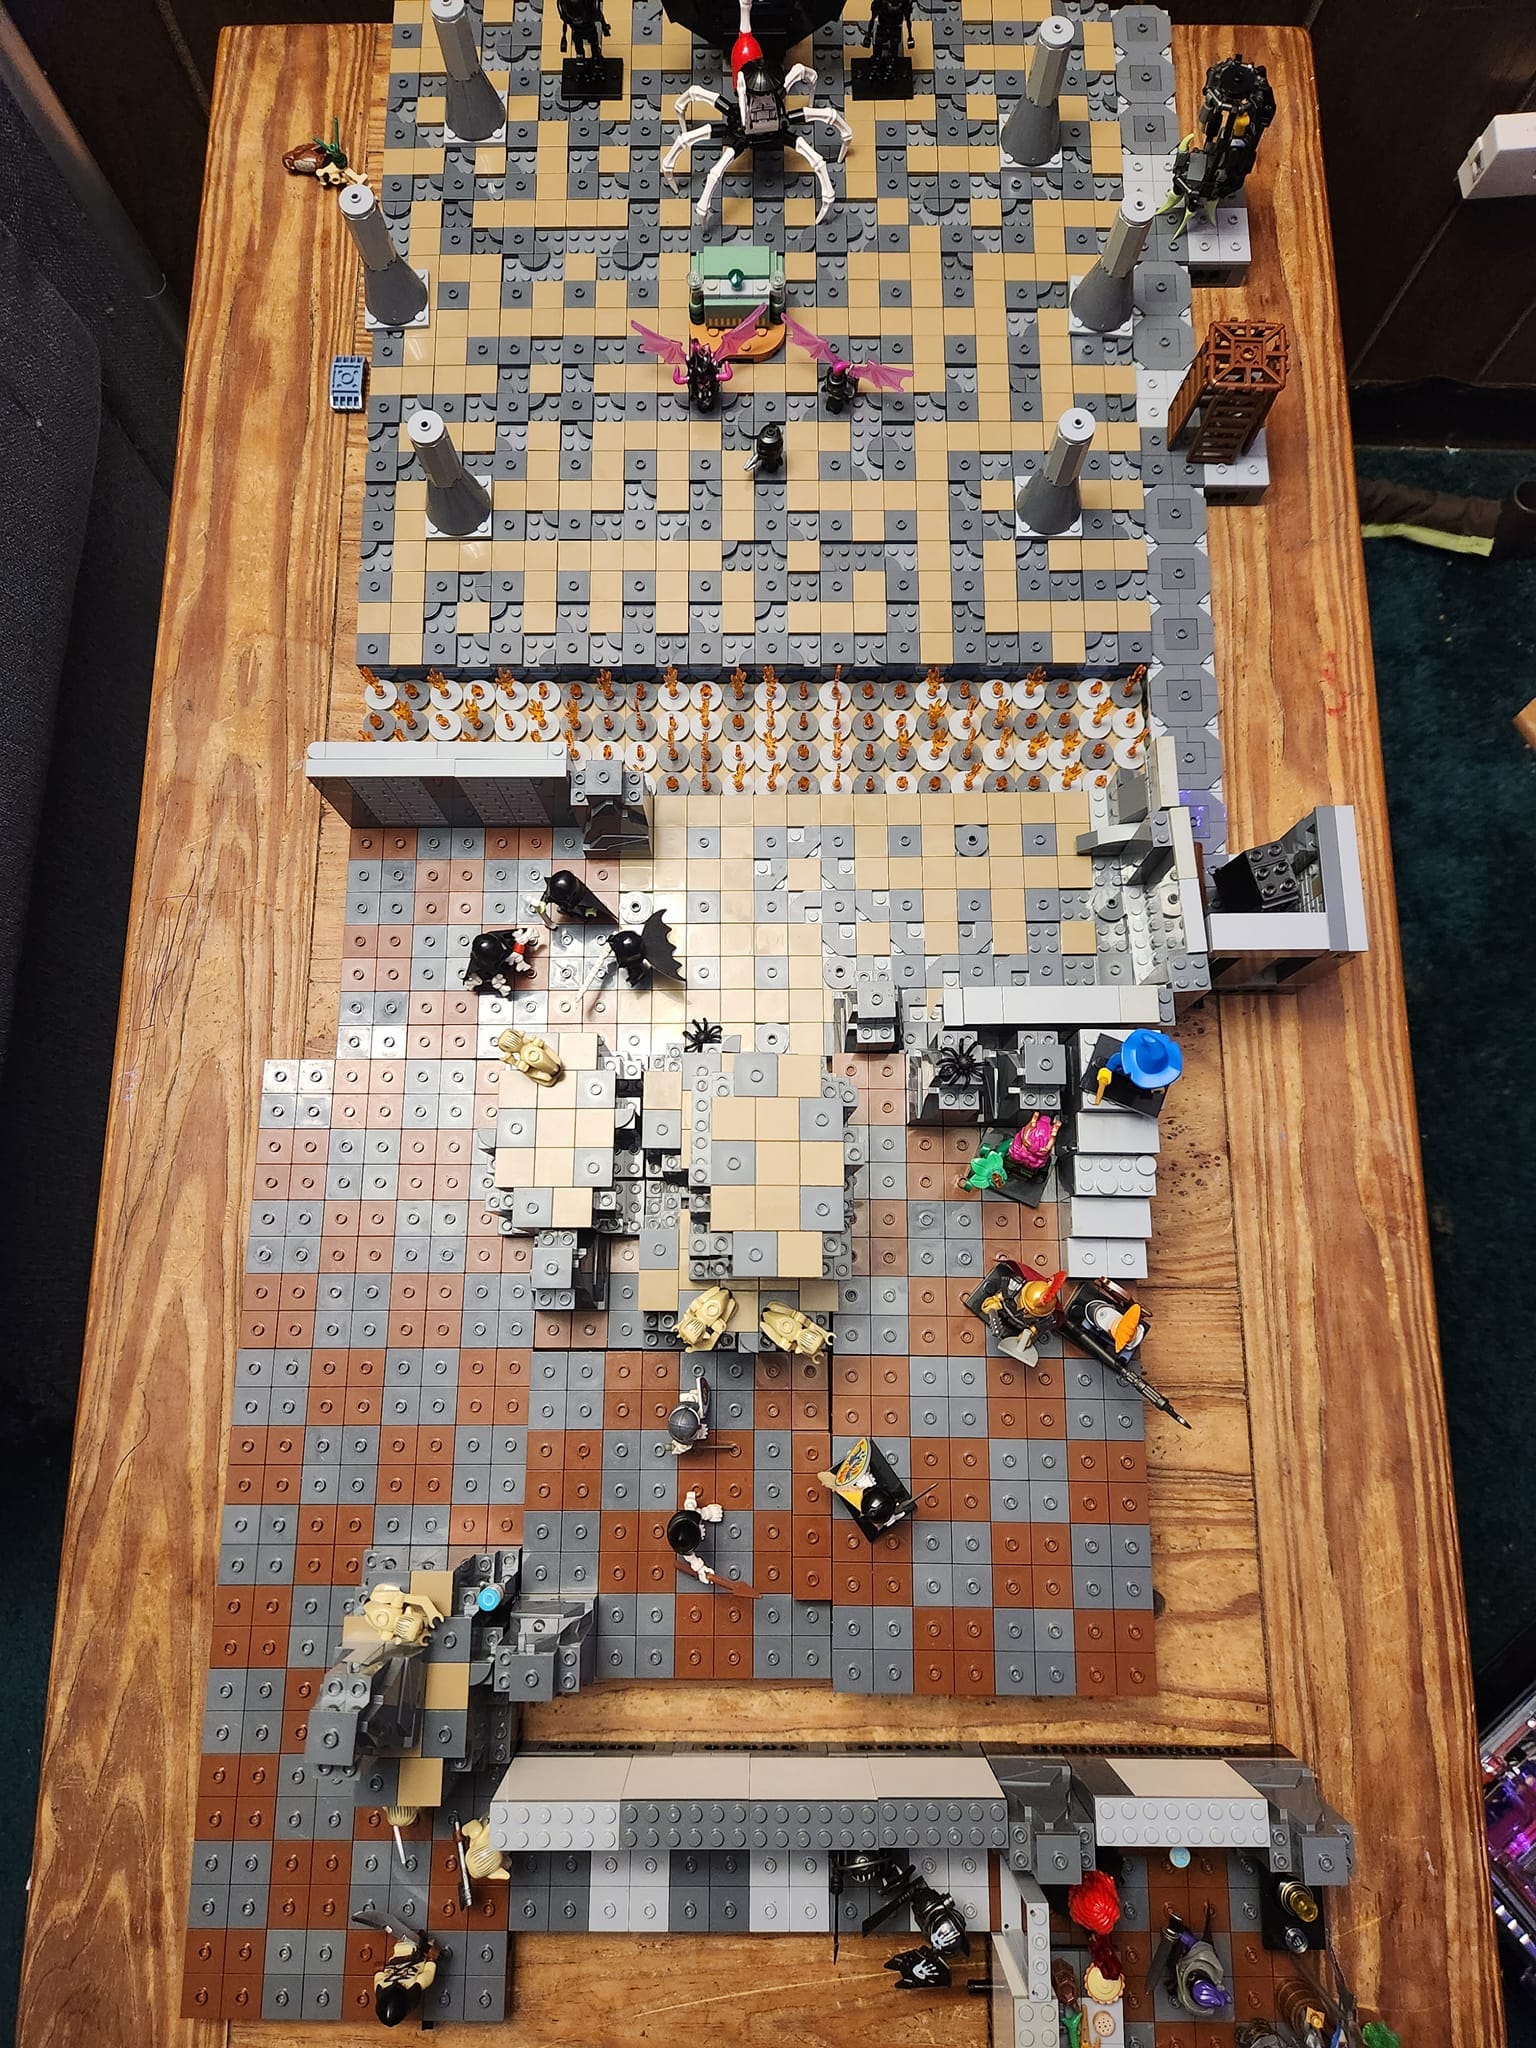
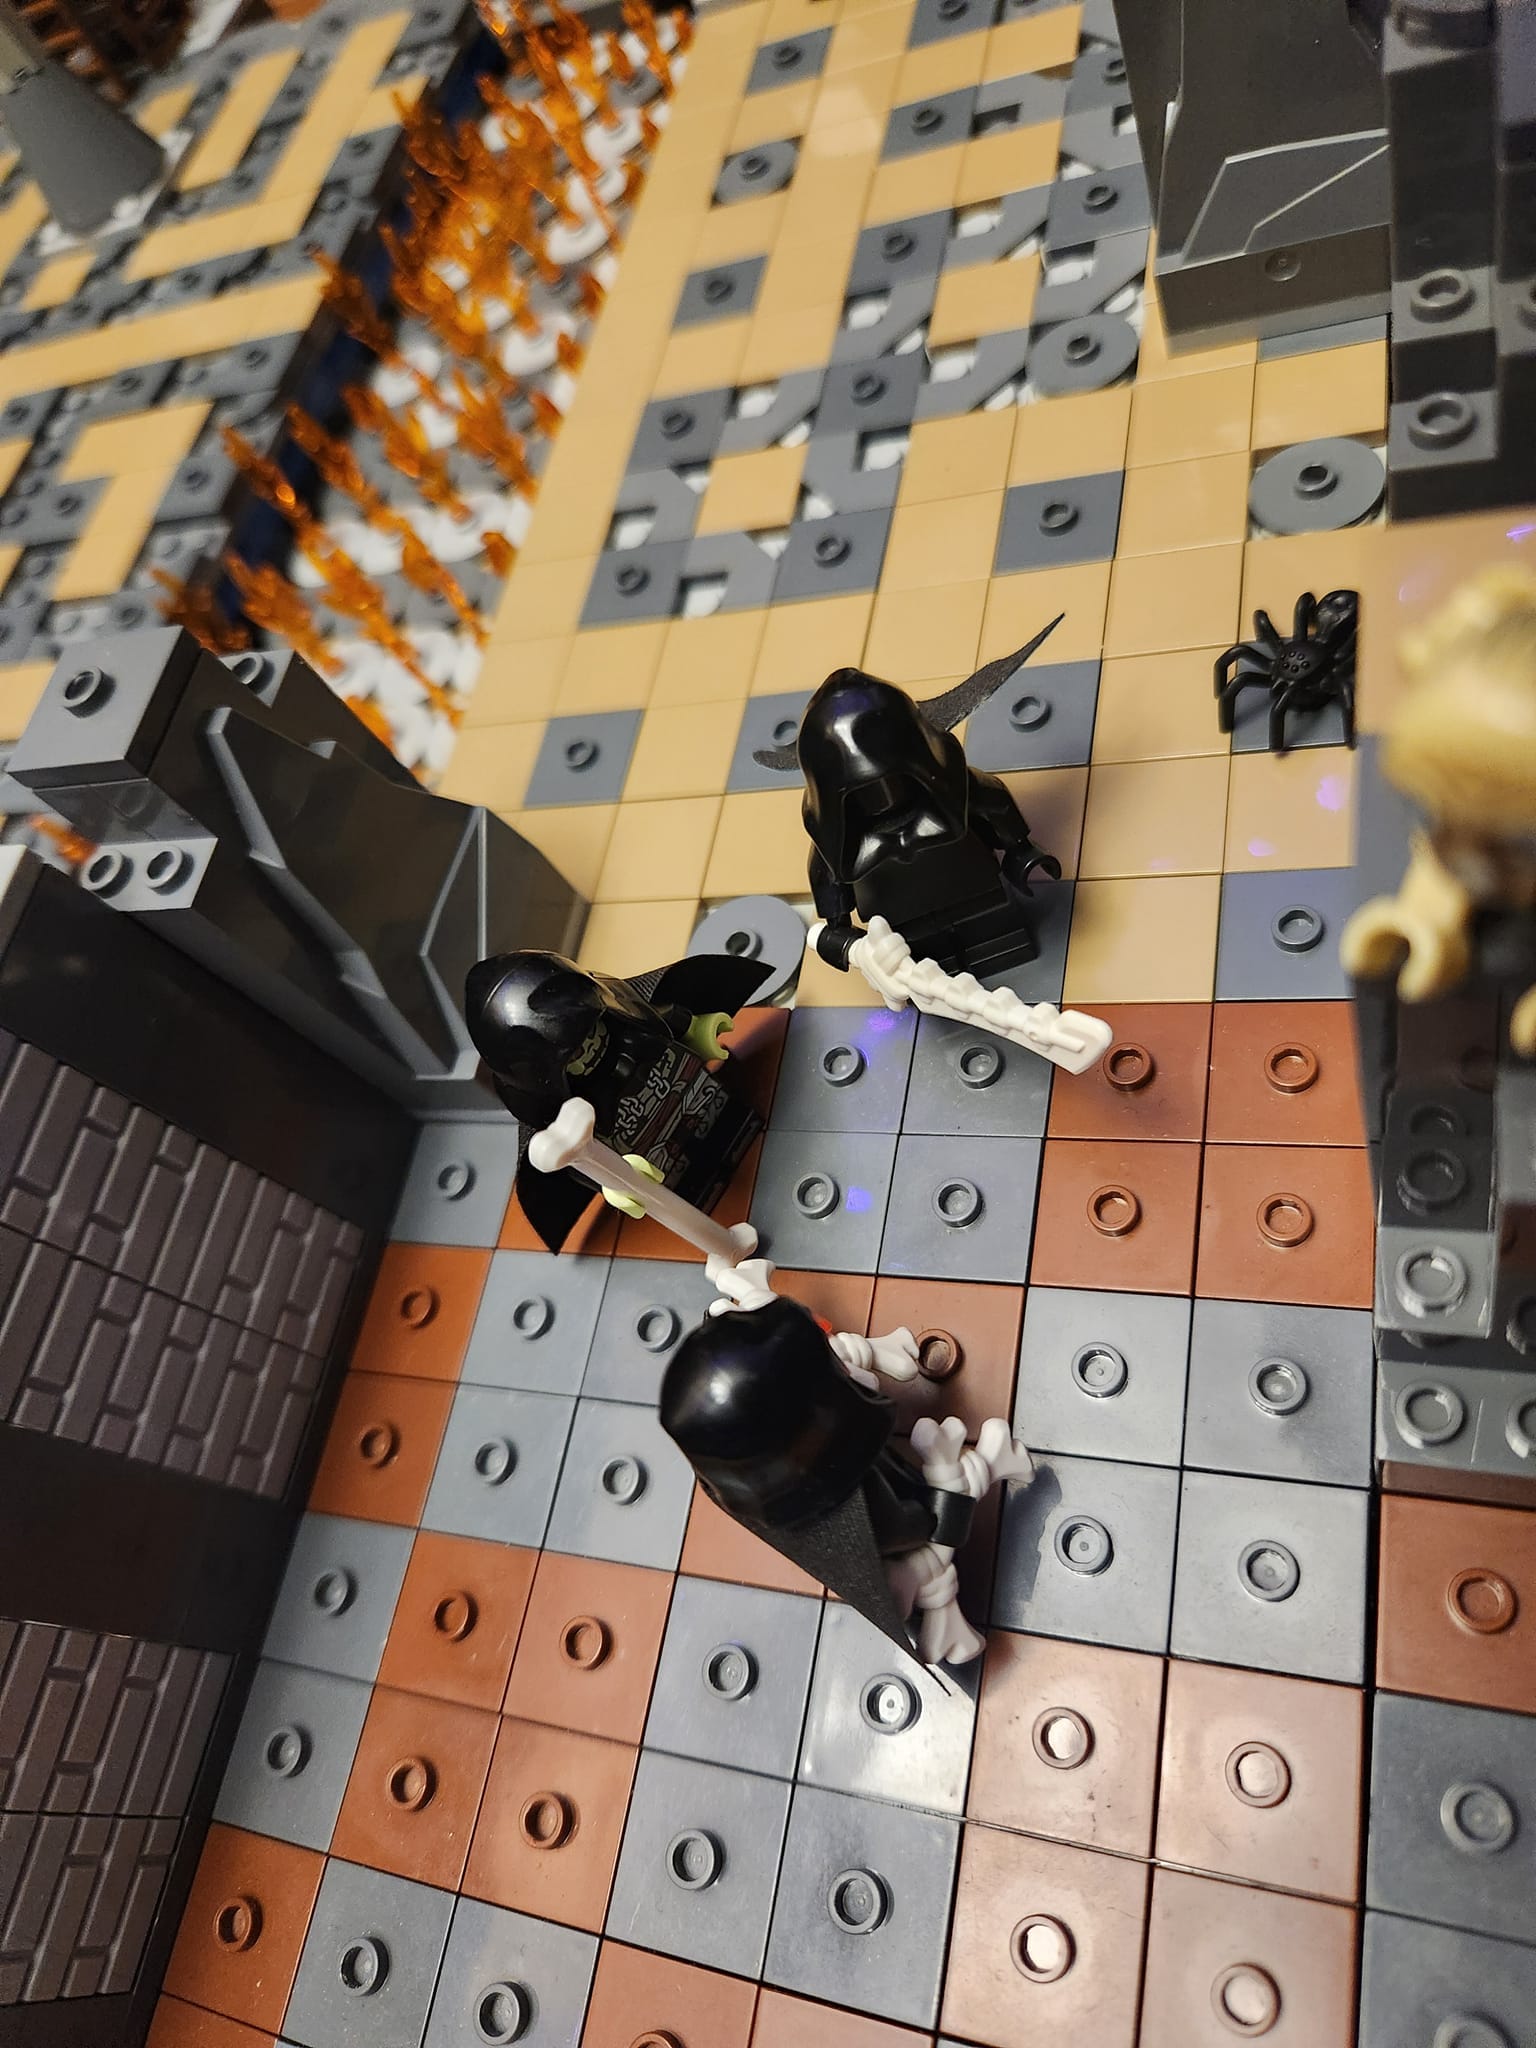
The system is compatible with other types of Lego TTRPG terrain as long as it's using a 4x4 stud grid square it should be fine. As I grow my 48x48 collection, I will be having a lot of mixed piece dungeons but overall, I don't feel like it detracts from the experience.
What's Next?
I'll post the instructions for the new MITTs 3.0 and various accessories as soon as I can finish it. As for the site, I appreciate the feedback and support. Now that I have some bandwidth, I'm going to try to post more examples of some of the awesome Lego TTRPG concepts that have been floating around this year and hopefully provide a place for people to get inspired to make their own!